Adding Xinput to USB Menu
This was where the project took an evil turn. It took all of 15 minutes to load up the joystick example and fill it with my own code. The complications came when trying to create a device not previously defined in the teensyduino libraries. I am used to libraries and examples that show you what to define and what to include. Where I can make copies in the project directory of anything I need. The arduino IDE is all about doing things in the background with no user intervention. This makes it terribly hard to make changes for just individual projects. This entire process creates a situation where, hopefully I stay up to date with teensyduino releases. I am replacing libraries within the installation which means I replace new functionality if I don’t keep up with releases. But this section isn’t about my hatred for the arduino environment and ideologies.
This is my first arduino IDE project and I was absolutely lost. The great thing about the internet was that someone was there to help me out. I found that help from Kenton Hamaluik‘s project where he makes a teensy joystick for his wedding arcade. Reading his post showed me that we needed to add a menu item that when selected defined a statement that we would continue to check for to include code. The first step is to edit the file boards.txt, which is located in the sub-folder hardware\teensy\avr\ of your arduino installation.
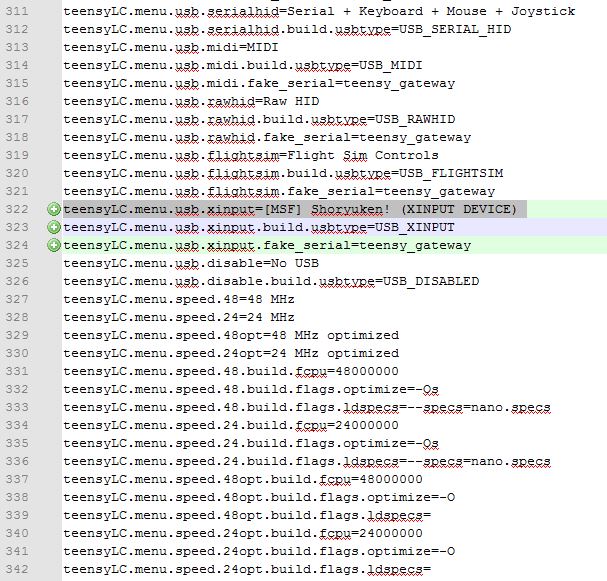
teensyLC.menu.usb.xinput=[MSF] Shoryuken! (XINPUT DEVICE)
teensyLC.menu.usb.xinput.build.usbtype=USB_XINPUT
teensyLC.menu.usb.xinput.fake_serial=teensy_gateway
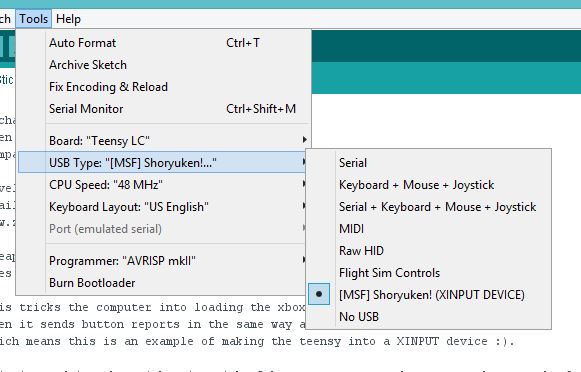
We need to add 3 simple lines to insert our device into the TeensyLC usb menu. Scroll down to right around line 321, then insert the 3 lines shown above the line that says “No USB”. You can theoretically put the entry anywhere in the menu, but I felt at the bottom would be best. Now the Xinput device type has been added to the menu and when selected defines USB_XINPUT as the usb type.
We still need to add a couple of pieces of code so that the correct headers are loaded and objects defined. The first piece of code we need to add is to the file called usb_inst.cpp. We need to tell the compiler that if USB_XINPUT is defined that it should created an instance of usb_xinput_class labeled XInput. I put the code below in at line 75:
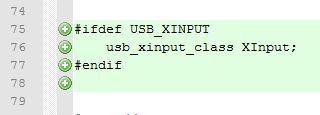
#ifdef USB_XINPUT
  usb_xinput_class XInput;
#endif
Finally to wrap this portion up, all we have left to do is include usb_xinput.h in the file Wprogram.h. We will discuss usb_xinput.h and its counterpart, usb_xinput.c, in a later section. All you need to know for now is that these two files contain the libraries we use to bridge our code with the standard USB code provided by teensyduino. I stuffed this include into line 32 of wprogram.h as follows:

#include "usb_xinput.h"